
ถ้าคุณอยากสร้าง AI Agent ที่ไม่ใช่แค่ตอบข้อความ — แต่คิดได้ วางแผนได้ และใช้ tool จริงๆ ได้ด้วย — บทความนี้คือจุดเริ่มต้น
เราจะใช้ Anthropic Python SDK เพื่อสร้าง agent loop ตั้งแต่ศูนย์ เขียน code จริง รัน test จริง และเสร็จภายใน 30 นาที ไม่ต้องมีพื้นฐาน ML มาก่อน แค่รู้ Python พื้นฐานก็พอ
1. Claude Agent SDK คืออะไร — จาก Anthropic
Anthropic ผู้สร้าง Claude ให้เครื่องมือสองระดับสำหรับนักพัฒนา:
- Anthropic Python SDK (
pip install anthropic) — low-level API สำหรับเรียก Claude โดยตรง รองรับ messages, tools, streaming และ vision เหมาะกับ developer ที่ต้องการ control เต็มที่ - Claude Agent SDK (
pip install claude-agent-sdk) — high-level abstraction ที่ wrap SDK พื้นฐานไว้ มี primitives เช่นClaudeSDKClientและ decorator สำหรับ MCP tools เหมาะกับการสร้าง multi-agent system ที่ซับซ้อน
บทความนี้จะสอน Anthropic Python SDK แบบ agentic — คือสร้าง agent loop ด้วยตัวเอง วิธีนี้เหมาะที่สุดสำหรับการเรียนรู้ เพราะคุณจะเข้าใจ mechanics ภายใน ก่อนจะไปใช้ high-level abstraction
เมื่อคุณเข้าใจพื้นฐานแล้ว ขั้นต่อไปคือ Multi-Agent System ภาษาไทย และ MCP Integration
ทำไมต้องสร้าง Agent เอง ไม่ใช้ ChatGPT?
คำถามที่ได้ยินบ่อย: "แค่ใช้ ChatGPT ไม่ดีกว่าหรือ?"
คำตอบขึ้นอยู่กับ use case แต่สำหรับ developer ที่ต้องการ:
- Integrate กับ system ของตัวเอง — เรียก internal API, เข้าถึง database ที่ไม่ได้ public, หรือทำงานกับ data ที่ sensitive
- Control behavior อย่างละเอียด — เลือก model, กำหนด system prompt, ควบคุม tool schema
- Cost optimization — เลือก model ตามงาน (Haiku สำหรับงานเร็ว, Opus สำหรับงานซับซ้อน)
- Build product — นำ agent ไปฝังใน app ของตัวเองได้
การสร้าง agent เองด้วย SDK คือการมี control ที่ ChatGPT API แบบ standard ไม่ให้
2. Claude Agent SDK ทำอะไรได้บ้าง
ก่อนเริ่ม code ขอให้เข้าใจว่า "agent" ในที่นี้หมายถึงอะไร ถ้าคุณยังไม่แน่ใจความแตกต่างระหว่าง agent กับ chatbot ธรรมดา อ่าน AI Agent vs Chatbot ต่างกันยังไง ก่อนได้เลย
สรุปสั้นๆ: agent ที่สร้างด้วย Anthropic SDK ทำได้ดังนี้
Tool Use (Function Calling) Agent สามารถเรียก function ที่คุณเขียนเองได้ — เช่น ค้นหาข้อมูล, เรียก API ภายนอก, อ่านไฟล์, หรือบันทึก database Claude จะตัดสินใจเองว่าจะเรียก tool ไหน เมื่อไหร่
Conversation Memory
ผ่าน messages array ที่ส่งเข้าไปแต่ละ turn — agent จำบทสนทนาก่อนหน้า และสามารถออกแบบ memory ระยะยาวด้วยตัวคุณเองได้
Streaming รองรับ response แบบ stream ทำให้ UX ดีขึ้น ไม่ต้องรอจนครบ
MCP Integration รองรับ Model Context Protocol — มาตรฐานเปิดสำหรับเชื่อมต่อ AI กับ tool และ data source ภายนอก เช่น file systems, databases, และ web services
3. เตรียมก่อนเริ่ม
สิ่งที่ต้องมี:
- Python 3.9+ — ตรวจด้วย
python --version - Anthropic API Key — ขอได้ที่ console.anthropic.com
- virtualenv หรือ
venv— แนะนำให้ใช้เสมอ
สร้าง project ใหม่:
mkdir my-claude-agent
cd my-claude-agent
python -m venv venv
source venv/bin/activate   # Windows: venv\Scripts\activate
pip install anthropic
ตั้งค่า API key (อย่า hardcode ใน code):
export ANTHROPIC_API_KEY="sk-ant-..."
หรือสร้างไฟล์ .env แล้วใช้ python-dotenv:
pip install python-dotenv
# .env
ANTHROPIC_API_KEY=sk-ant-...
4. Tutorial: สร้าง Simple Agent ใน 30 นาที
ขั้นที่ 1 — Basic Agent Loop (5 นาที)
สร้างไฟล์ agent.py:
import os
import anthropic

client = anthropic.Anthropic(api_key=os.environ.get("ANTHROPIC_API_KEY"))

def chat(user_message: str, messages: list) -> str:
    """ส่ง message และ return response text"""
    messages.append({"role": "user", "content": user_message})

    response = client.messages.create(
        model="claude-opus-4-5",
        max_tokens=1024,
        system="คุณคือ assistant ที่ช่วยเหลือได้อย่างมีประสิทธิภาพ ตอบเป็นภาษาไทย",
        messages=messages,
    )

    assistant_message = response.content[0].text
    messages.append({"role": "assistant", "content": assistant_message})
    return assistant_message

# ทดสอบ
conversation_history = []
reply = chat("สวัสดี บอกชื่อตัวเองให้ฟังหน่อย", conversation_history)
print(reply)
รันดู:
python agent.py
ถ้าเห็น Claude ตอบกลับเป็นภาษาไทย — แสดงว่า setup ถูกต้องแล้ว API key ใช้งานได้ และ connection ไปยัง Anthropic API เรียบร้อย
หมายเหตุ: Model
claude-opus-4-5เป็น high-performance model เหมาะสำหรับงานซับซ้อน ถ้าต้องการประหยัด cost ในช่วง development ลองเปลี่ยนเป็นclaude-haiku-4-5ซึ่งเร็วกว่าและราคาถูกกว่ามาก
ขั้นที่ 2 — เพิ่ม Tool ให้ Agent (10 นาที)
นี่คือส่วนที่ทำให้ Agent แตกต่างจาก chatbot ธรรมดา — เราจะเพิ่ม tool สำหรับดูเวลาปัจจุบัน
import os
import json
import anthropic
from datetime import datetime

client = anthropic.Anthropic(api_key=os.environ.get("ANTHROPIC_API_KEY"))

# 1. กำหนด Tool Schema
tools = [
    {
        "name": "get_current_time",
        "description": "ดึงวันที่และเวลาปัจจุบัน (timezone ไทย UTC+7)",
        "input_schema": {
            "type": "object",
            "properties": {
                "format": {
                    "type": "string",
                    "description": "รูปแบบ เช่น 'full' หรือ 'time_only'",
                    "enum": ["full", "time_only", "date_only"],
                }
            },
            "required": [],
        },
    }
]

# 2. Python function ที่ map กับ tool
def get_current_time(format: str = "full") -> str:
    now = datetime.now()
    if format == "time_only":
        return now.strftime("%H:%M:%S")
    elif format == "date_only":
        return now.strftime("%Y-%m-%d")
    else:
        return now.strftime("%Y-%m-%d %H:%M:%S")

# 3. Tool dispatcher
def execute_tool(tool_name: str, tool_input: dict) -> str:
    if tool_name == "get_current_time":
        return get_current_time(**tool_input)
    return f"Tool '{tool_name}' ไม่รู้จัก"

# 4. Agent Loop ที่รองรับ tool use
def agent_with_tools(user_message: str, messages: list) -> str:
    messages.append({"role": "user", "content": user_message})

    while True:
        response = client.messages.create(
            model="claude-opus-4-5",
            max_tokens=1024,
            system="คุณคือ assistant ที่มี tools ช่วยเหลือ ตอบเป็นภาษาไทย",
            tools=tools,
            messages=messages,
        )

        # ถ้า Claude ตอบตรงๆ ไม่ต้องใช้ tool
        if response.stop_reason == "end_turn":
            text_blocks = [b.text for b in response.content if hasattr(b, "text")]
            final_text = " ".join(text_blocks)
            messages.append({"role": "assistant", "content": response.content})
            return final_text

        # ถ้า Claude ต้องการเรียก tool
        if response.stop_reason == "tool_use":
            messages.append({"role": "assistant", "content": response.content})

            # หา tool_use blocks ทั้งหมด
            tool_results = []
            for block in response.content:
                if block.type == "tool_use":
                    result = execute_tool(block.name, block.input)
                    tool_results.append({
                        "type": "tool_result",
                        "tool_use_id": block.id,
                        "content": result,
                    })

            # ส่ง tool results กลับไปให้ Claude
            messages.append({"role": "user", "content": tool_results})
            # Loop ต่อ — Claude จะประมวลผล tool result และตอบ
ขั้นที่ 3 — Run และ Test (5 นาที)
เพิ่ม test ท้ายไฟล์:
if __name__ == "__main__":
    history = []

    print("=== ทดสอบ Agent with Tools ===\n")

    # Test 1: ถามเวลา (ควรใช้ tool)
    q1 = "ตอนนี้กี่โมงแล้ว?"
    print(f"User: {q1}")
    ans1 = agent_with_tools(q1, history)
    print(f"Agent: {ans1}\n")

    # Test 2: คำถามทั่วไป (ไม่ต้องใช้ tool)
    q2 = "Python คืออะไร อธิบายสั้นๆ"
    print(f"User: {q2}")
    ans2 = agent_with_tools(q2, history)
    print(f"Agent: {ans2}\n")

    # Test 3: Agent จำบทสนทนาก่อนหน้าได้ไหม?
    q3 = "ฉันถามเรื่องอะไรไปก่อนหน้านี้บ้าง?"
    print(f"User: {q3}")
    ans3 = agent_with_tools(q3, history)
    print(f"Agent: {ans3}\n")
รัน:
python agent.py
ผลลัพธ์ที่ควรเห็น: Claude เรียก get_current_time เองโดยอัตโนมัติ ตอบเรื่อง Python และจำบทสนทนาก่อนหน้าได้
ขั้นที่ 4 — เพิ่ม Tool ที่มีประโยชน์มากขึ้น
ตัวอย่าง tool สำหรับ fetch ข้อมูลจาก API:
import httpx

def search_wikipedia(query: str, lang: str = "th") -> str:
    """ค้นหาข้อมูลจาก Wikipedia"""
    url = f"https://{lang}.wikipedia.org/api/rest_v1/page/summary/{query}"
    try:
        with httpx.Client(timeout=10) as http:
            resp = http.get(url)
            if resp.status_code == 200:
                data = resp.json()
                return data.get("extract", "ไม่พบข้อมูล")
            return f"Error: HTTP {resp.status_code}"
    except Exception as e:
        return f"Error: {str(e)}"
เพิ่ม schema ใน tools list:
{
    "name": "search_wikipedia",
    "description": "ค้นหาข้อมูลสรุปจาก Wikipedia",
    "input_schema": {
        "type": "object",
        "properties": {
            "query": {
                "type": "string",
                "description": "คำที่ต้องการค้นหา เช่น 'Python programming language'",
            },
            "lang": {
                "type": "string",
                "description": "ภาษา Wikipedia: 'th' หรือ 'en'",
                "default": "th",
            },
        },
        "required": ["query"],
    },
},
อัพเดท execute_tool:
def execute_tool(tool_name: str, tool_input: dict) -> str:
    if tool_name == "get_current_time":
        return get_current_time(**tool_input)
    elif tool_name == "search_wikipedia":
        return search_wikipedia(**tool_input)
    return f"Tool '{tool_name}' ไม่รู้จัก"
5. ส่วนประกอบของ Agent ที่ควรรู้
เมื่อสร้าง Agent ด้วย Anthropic SDK มีสามส่วนหลัก:
System Prompt — บุคลิกและขอบเขตของ Agent
System prompt คือ "วิญญาณ" ของ Agent กำหนดว่ามันเป็นใคร ทำอะไรได้บ้าง และตอบสนองอย่างไร ออกแบบให้ชัดเจน:
system = """คุณคือ Customer Service Agent ของร้านค้าออนไลน์ XYZ

หน้าที่:
- ตอบคำถามเรื่องสินค้าและราคา
- ตรวจสอบสถานะออเดอร์ (ใช้ tool check_order)
- รับเรื่องร้องเรียน แต่ไม่ยืนยัน refund เอง

ห้าม:
- เปิดเผยข้อมูลลูกค้าคนอื่น
- ยืนยันข้อมูลที่ไม่ได้มาจาก tool

ตอบเป็นภาษาไทย สุภาพ กระชับ"""
Tools — ความสามารถพิเศษ
Tools คือสิ่งที่ทำให้ Agent ทำงานได้จริง ไม่ใช่แค่ generate text คิดว่า tool เป็นเหมือน "มือ" ที่ Agent ใช้โต้ตอบกับโลกภายนอก
ออกแบบ tool schema ให้:
descriptionชัดเจน — Claude ใช้ description ในการตัดสินใจว่าจะเรียก tool ไหนinput_schemaครบถ้วน — ระบุrequiredเสมอ- Return value กระชับ — Claude จะอ่านผล tool แล้วตอบ ถ้า return ยาวเกินไปเปลือง token
Memory — การจำบทสนทนา
Anthropic SDK ไม่มี built-in memory — คุณต้องจัดการเอง ผ่าน messages array:
# Short-term memory: ส่ง conversation history ทุก request
messages = [
    {"role": "user", "content": "สวัสดี"},
    {"role": "assistant", "content": "สวัสดีครับ มีอะไรให้ช่วยไหม?"},
    {"role": "user", "content": "ฉันชื่ออะไร"},  # <-- Claude จะตอบไม่ได้ เพราะยังไม่ได้บอก
]

# Long-term memory: เพิ่มในระบบ
# Pattern ง่ายๆ: เก็บ key facts ใน system prompt dynamically
user_facts = {"name": "สมชาย", "preference": "ชอบ Python"}
system = f"User info: {json.dumps(user_facts, ensure_ascii=False)}\n\n{base_system}"
สำหรับ production ดู Multi-Agent System ที่ครอบคลุม vector memory และ long-term storage
Pattern เพิ่มเติม: การออกแบบ Tool ที่ดี
Tool ที่ออกแบบดีคือหัวใจของ agent ที่มีประสิทธิภาพ หลักการที่ควรรู้:
Single Responsibility — tool หนึ่งตัวทำหนึ่งอย่าง อย่ายัดทุกอย่างไว้ใน tool เดียว:
# ไม่ดี — tool เดียวทำหลายอย่าง
{
    "name": "manage_database",
    "description": "อ่าน เขียน ลบ และค้นหา database",
}

# ดีกว่า — แยก tool ตามหน้าที่
{
    "name": "search_products",
    "description": "ค้นหาสินค้าตามชื่อหรือ category",
},
{
    "name": "get_product_detail",
    "description": "ดูรายละเอียดสินค้าจาก product_id",
},
Error Handling ใน Tool — อย่า raise exception ออกมา ให้ return error message แทน Claude จะอ่านและแจ้ง user ได้เอง:
def get_weather(city: str) -> str:
    try:
        # เรียก weather API
        result = weather_api.get(city)
        return f"อุณหภูมิที่ {city}: {result['temp']}°C, {result['condition']}"
    except ConnectionError:
        return f"ไม่สามารถเชื่อมต่อ weather service ได้ กรุณาลองใหม่"
    except KeyError:
        return f"ไม่พบข้อมูลเมือง '{city}' กรุณาตรวจสอบชื่อเมือง"
Idempotent Tools — tool ที่เรียกซ้ำหลายครั้งควรให้ผลเหมือนกัน โดยเฉพาะ tool ที่ query data (ไม่ใช่ modify) ทำให้ agent retry ได้อย่างปลอดภัย
6. ข้อผิดพลาดที่ Dev มักเจอ + วิธีแก้
Error: AuthenticationError
anthropic.AuthenticationError: Error code: 401
สาเหตุ: API key ผิดหรือไม่ได้ set
แก้: ตรวจสอบ env variable — echo $ANTHROPIC_API_KEY ต้องขึ้นต้นด้วย sk-ant-
Error: infinite loop — Agent ไม่หยุด
สาเหตุ: ลืม check stop_reason หรือ tool execution ไม่ append result กลับเข้า messages
แก้: ตรวจ loop logic:
# ต้องมีเงื่อนไขออก loop เสมอ
if response.stop_reason == "end_turn":
    return final_text  # <-- ออก loop ที่นี่

# ถ้าไม่ใช่ tool_use ก็ออก loop
if response.stop_reason not in ["tool_use"]:
    return ""
Error: tool_use แต่ Claude ไม่เรียก tool
สาเหตุ: description ของ tool ไม่ชัดพอ Claude ไม่รู้ว่าควรใช้เมื่อไหร่
แก้: ปรับ description ให้บอก context ว่าเรียกเมื่อไหร่:
# ไม่ดี
"description": "Get time"

# ดีกว่า
"description": "ดึงวันที่และเวลาปัจจุบัน ใช้เมื่อ user ถามว่า 'กี่โมง', 'วันนี้วันที่เท่าไหร่', หรือต้องการข้อมูลเวลาจริง"
Error: max_tokens หมดกลางทาง
สาเหตุ: ตั้ง max_tokens น้อยเกินไป หรือ conversation history ยาวมากจนกิน input tokens
แก้: เพิ่ม max_tokens (สูงสุดตามโมเดล) หรือตัด conversation history ที่เก่าเกินออก:
# เก็บแค่ N messages ล่าสุด
MAX_HISTORY = 20
if len(messages) > MAX_HISTORY:
    messages = messages[-MAX_HISTORY:]
Error: ValidationError จาก tool input
สาเหตุ: Claude ส่ง tool input ที่ไม่ตรง schema — มักเกิดเมื่อ schema ไม่ชัดเจน
แก้: เพิ่ม validation ใน execute_tool:
def execute_tool(tool_name: str, tool_input: dict) -> str:
    try:
        if tool_name == "get_current_time":
            return get_current_time(**tool_input)
    except TypeError as e:
        return f"Tool input error: {str(e)}"
    return f"Unknown tool: {tool_name}"
7. Next Steps — ไปต่อที่ไหนได้บ้าง
เมื่อ Agent ตัวแรกทำงานได้แล้ว ขั้นต่อไปที่แนะนำ:
Multi-Agent System แทนที่จะมี agent ตัวเดียวทำทุกอย่าง ออกแบบให้มีหลาย agent แบ่งหน้าที่กัน เช่น Planner Agent, Executor Agent, Reviewer Agent — อ่านได้ที่ Multi-Agent System ภาษาไทย
MCP Integration เชื่อมต่อ Agent กับ external tools ผ่านมาตรฐาน MCP — ทำให้แชร์ tools ข้าม agent ได้ง่าย อ่าน MCP คืออะไร
เปรียบเทียบ Claude vs OpenAI Agents ถ้าสงสัยว่า Claude Agent SDK กับ OpenAI Agents SDK ต่างกันยังไง อ่าน OpenAI Agents vs Claude Agent SDK เปรียบเทียบ
Prompt Caching สำหรับ agent ที่มี system prompt ยาวและ tools หลายตัว การเปิด prompt caching ช่วยลด latency และ cost ได้มาก:
response = client.messages.create(
    model="claude-opus-4-5",
    max_tokens=1024,
    system=[
        {
            "type": "text",
            "text": long_system_prompt,
            "cache_control": {"type": "ephemeral"},  # cache ไว้ 5 นาที
        }
    ],
    messages=messages,
    tools=tools,
)
เหมาะมากสำหรับ agent ที่ call API บ่อยในช่วงเวลาสั้น
Streaming เพิ่ม real-time UX ด้วย streaming API:
with client.messages.stream(
    model="claude-opus-4-5",
    max_tokens=1024,
    messages=messages,
) as stream:
    for text in stream.text_stream:
        print(text, end="", flush=True)
Deploy Agent ที่สร้างแล้วสามารถ deploy เป็น REST API ด้วย FastAPI หรือ Flask แล้วเชื่อมกับ frontend ได้
ก้าวต่อไปกับ AI Unlocked
Tutorial นี้ครอบคลุมพื้นฐาน Claude Agent SDK ตั้งแต่ agent loop เดี่ยวๆ ไปจนถึง tool use แบบ multi-step แต่นี่เป็นแค่จุดเริ่มต้น
สำหรับ developer ที่ต้องการสร้าง Agent ระดับ production ที่ใช้งานจริง — รวมถึง multi-agent orchestration, error handling ระดับ enterprise, และ deployment บน cloud — อ่านภาพรวมทั้งหมดได้ที่ Build AI Agent ภาษาไทย Complete Guide
อยากเรียนแบบมี structure มี mentor และ community คนไทยที่ทำ AI project จริงๆ?
คอร์สของเราครอบคลุมตั้งแต่ Prompt Engineering พื้นฐาน ไปจนถึง Agent Development และ Vibe Coding — สอนภาษาไทย เรียนได้ทุกที่ทุกเวลา
อยากเรียนรู้เรื่อง AI เพิ่มเติม? อ่าน AI สำหรับนักเรียน Chiang Mai และทั่วไทย สำหรับ roadmap การเรียน AI ปี 2026
คำถามที่พบบ่อย (FAQ)
Q: ต้องมีพื้นฐานอะไรก่อนตาม tutorial นี้?
ไม่ต้องมีพื้นฐาน ML มาก่อน แค่รู้ Python พื้นฐานก็พอ ต้องมี Python 3.9+, Anthropic API Key จาก console.anthropic.com และแนะนำให้ใช้ venv จากนั้น pip install anthropic แล้วตั้ง ANTHROPIC_API_KEY ใน env ห้าม hardcode ในโค้ด
Q: Claude Agent SDK กับ Anthropic Python SDK ต่างกันยังไง?
Anthropic Python SDK (pip install anthropic) เป็น API ระดับต่ำ เรียก Claude โดยตรง คุม messages, tools, streaming และ vision ได้เต็มที่ Claude Agent SDK (pip install claude-agent-sdk) เป็นชั้นสูงที่มี primitives อย่าง ClaudeSDKClient และ decorator สำหรับ MCP tools เหมาะกับ multi-agent ที่ซับซ้อน บทความนี้สอนแบบ agentic บน SDK ระดับต่ำเพื่อให้เข้าใจกลไกภายในก่อน
Q: สร้าง Agent เองทำไม ไม่ใช้ ChatGPT ไปเลย? ถ้าต้องการต่อกับระบบภายใน เรียก API หรือฐานข้อมูลที่ไม่เปิดสาธารณะ คุม behavior ละเอียด เลือกโมเดลตามงานเพื่อประหยัดต้นทุน (Haiku งานเร็ว, Opus งานซับซ้อน) หรือจะเอา agent ไปฝังในสินค้าของตัวเอง การสร้างด้วย SDK ให้ control ที่ ChatGPT แบบ standard ไม่ให้
Q: ทำ Agent ตัวแรกใช้เวลานานไหม? บทความออกแบบให้ทำตามได้ใน 30 นาที เริ่มจาก agent loop พื้นฐาน แล้วต่อ tool use แบบ multi-step ได้ในบทเดียวกัน
Q: Anthropic SDK มี memory ในตัวไหม?
ไม่มี built-in memory คุณต้องจัดการเองผ่านอาร์เรย์ messages ระยะสั้นส่งประวัติทุกคำขอ ระยะยาวเก็บข้อเท็จจริงสำคัญแล้วฉีดเข้า system prompt ได้ บทความเตือนว่าอย่าลืมเช็ค stop_reason ไม่งั้น agent อาจวนไม่หยุด
Q: API key ผิดหรือ agent ไม่เรียก tool แก้ยังไง?
AuthenticationError 401 มักเพราะคีย์ผิดหรือไม่ได้ set — คีย์ต้องขึ้นต้นด้วย sk-ant- ถ้า Claude ไม่เรียก tool มักเพราะ description ไม่ชัด ควรบอกบริบทว่าเรียกเมื่อไหร่ ถ้า max_tokens หมดกลางทาง ให้เพิ่มค่าหรือตัดประวัติเก่า เหลือประมาณ 20 ข้อความล่าสุด
เขียนโดย
AI Unlocked Team
สถาบันสอน AI และ Vibe Coding — เชียงใหม่และออนไลน์
AI Unlocked สอน AI และ Vibe Coding มากว่า 15 ปี ผู้เรียนกว่า 1,500 คน โฟกัสลงมือทำจริงด้วย Claude Code, n8n และ AI Agent
บทความในหัวข้อเดียวกัน
สร้าง AI Agent — Complete Guide ภาษาไทย 2026
เรียนรู้สร้าง AI Agent ตั้งแต่ศูนย์ ครอบคลุม Claude Agent SDK, OpenAI Agents, LangGraph, n8n พร้อม Use Case ธุรกิจไทย — เริ่มต้นได้วันนี้
AI Agent + Voice — สอนสร้าง Voice Assistant ภาษาไทย
สอนสร้าง AI Voice Agent ภาษาไทยตั้งแต่ STT → LLM → TTS พร้อม tutorial Python และ use case จริง — เริ่มต้นได้วันนี้ที่ aiunlock.co
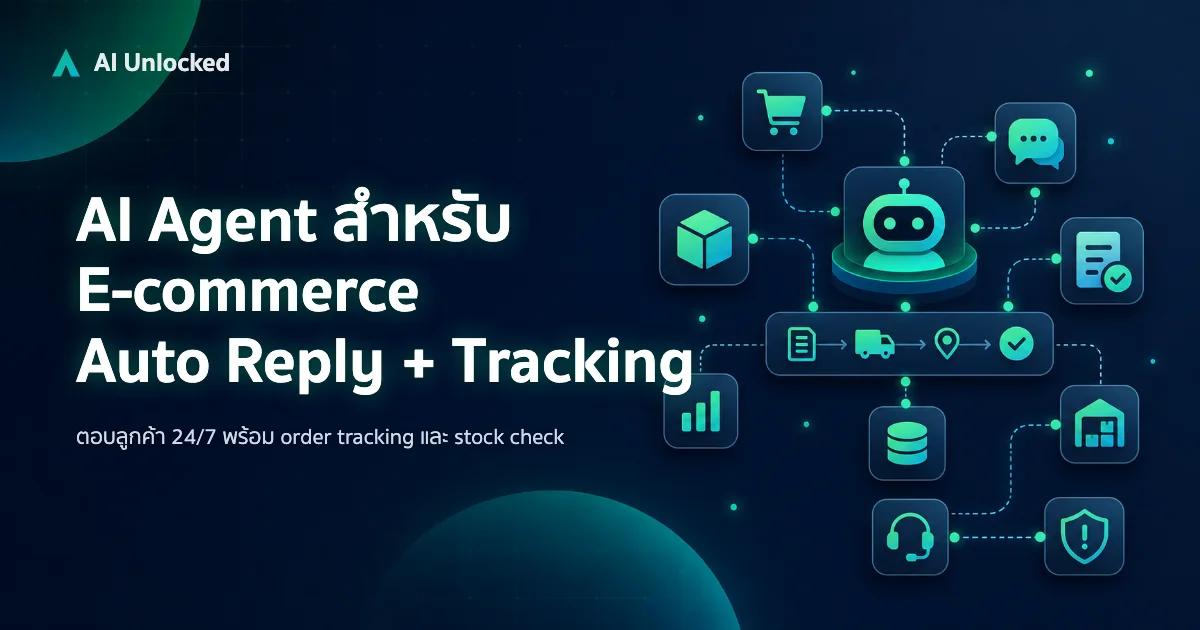
AI Agent สำหรับ E-commerce — Auto Reply + Order Tracking
AI Agent ecommerce ตอบลูกค้า 24/7 บน Shopee, Lazada, Line, FB — ครอบคลุม order tracking, stock check, escalation พร้อม workflow จริง เริ่มต้นได้เลย