
AI Agent + Telegram Bot — สอนสร้าง Assistant ส่วนตัว
ลองนึกภาพว่าคุณแค่พิมพ์ใน Telegram ว่า "สรุปอีเมลวันนี้ แล้วเพิ่มงานลง Notion" แล้ว AI ทำให้ทุกอย่างเสร็จภายใน 5 วินาที ไม่ต้องเปิด app หลายอัน ไม่ต้อง copy-paste — ทุกอย่างอยู่ในแชทเดียว
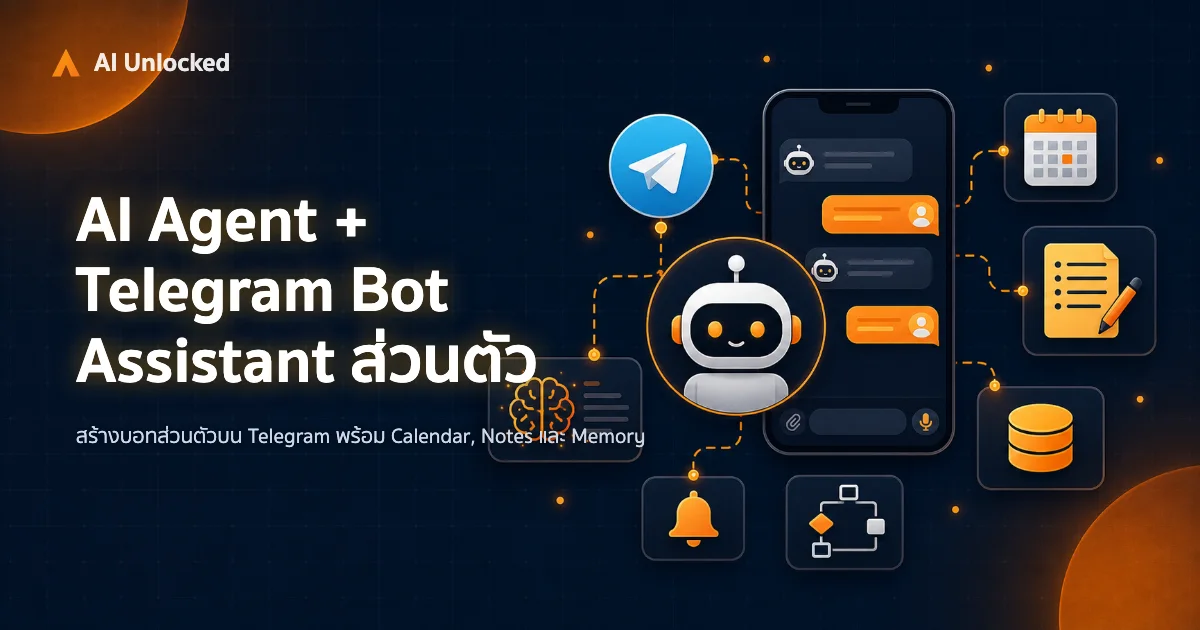
ลองนึกภาพว่าคุณแค่พิมพ์ใน Telegram ว่า "สรุปอีเมลวันนี้ แล้วเพิ่มงานลง Notion" แล้ว AI ทำให้ทุกอย่างเสร็จภายใน 5 วินาที ไม่ต้องเปิด app หลายอัน ไม่ต้อง copy-paste — ทุกอย่างอยู่ในแชทเดียว
ai agent telegram คือ keyword ที่นักพัฒนาและ hobbyist ค้นหากันเพิ่มขึ้นอย่างรวดเร็ว เพราะ Telegram เป็นแพลตฟอร์มที่เหมาะกับการสร้าง Personal Assistant มากที่สุดในปี 2026 บทความนี้จะพาคุณสร้างตั้งแต่เริ่มต้นจนถึง Deploy จริงบน Cloud
สารบัญ
- ทำไม Telegram เหมาะกับ Personal AI Assistant
- สร้าง Bot ผ่าน BotFather (5 นาที)
- เชื่อม Python + python-telegram-bot
- ใส่ LLM เป็นสมอง (Claude / GPT)
- เพิ่ม Tool: Notion, Calendar, Web Search
- Memory ระยะยาว
- Deploy บน Cloud
- Use Case ส่วนตัว
- CTA: เรียน AI Agent แบบลึก
ทำไม Telegram เหมาะกับ Personal AI Assistant
เหตุผลหลักที่ผมเลือก Telegram แทน LINE หรือ WhatsApp สำหรับ Personal Bot:
1. Bot API ฟรีและไม่มีข้อจำกัดยิบย่อย
Telegram Bot API ใช้ได้ฟรีไม่จำกัด message ต่อเดือน ต่างจาก LINE Messaging API ที่ฟรีได้แค่ 500 messages/เดือนในแพลนเริ่มต้น สำหรับ Personal Bot ที่ใช้เองคนเดียว เรื่องค่าใช้จ่ายจึงแทบเป็นศูนย์
2. Command ใช้งานง่าย
Telegram รองรับ /command แบบ native ทำให้สร้าง shortcut ต่างๆ ง่ายมาก เช่น /todo, /note, /remind โดยไม่ต้องเขียน NLP ซับซ้อน
3. Privacy สูงกว่า
Bot ของคุณรับแค่ message จากตัวเองได้ (ใช้ chat_id filter) ไม่มีใครอื่นเข้ามาได้ถ้าคุณไม่ตั้งใจเปิด
4. Rich Message Format
Markdown, inline buttons, file upload, location sharing — Telegram รองรับทั้งหมดนี้ผ่าน Bot API ทำให้ Bot ตอบกลับได้สวยงามและ interactive
5. Cross-platform
เปิดใน iOS, Android, Desktop, Web ได้ทุกที่ ต่างจาก iMessage ที่ lock-in กับ Apple ecosystem
สำหรับ use case ธุรกิจ SME อยากดู Line OA เปรียบเทียบด้วย ลองอ่าน AI Agent + Line OA — สอนสร้าง Chatbot ขายของ
สร้าง Bot ผ่าน BotFather (5 นาที)
ขั้นตอนแรกของทุก Telegram Bot คือการลงทะเบียนกับ @BotFather ซึ่งเป็น official bot ของ Telegram สำหรับสร้างและจัดการ Bot
ขั้นตอน:
- เปิด Telegram แล้วค้นหา
@BotFather - พิมพ์
/newbot - ตั้งชื่อ Bot (ชื่อแสดง เช่น "My Personal AI")
- ตั้ง username ต้องลงท้ายด้วย
bot(เช่นmy_personal_ai_bot) - รับ Bot Token — เก็บไว้ให้ดี อย่าแชร์กับใคร
BotFather: Done! Congratulations on your new bot.
Use this token to access the HTTP API:
7123456789:AAHdqTcvCH1vGWJxfSeofSh0K4A6bDOY
ตั้งค่าเพิ่มเติมที่แนะนำ:
/setdescription  - คำอธิบาย Bot
/setcommands     - กำหนด command list ที่ users เห็น
/setprivacy      - ปิด privacy mode สำหรับ group (ถ้าใช้ใน group)
สำหรับ Personal Bot ให้ทำตาม /setcommands แล้วกำหนด:
todo - เพิ่ม task ใหม่
note - บันทึก note
remind - ตั้ง reminder
search - ค้นหาข้อมูล
ask - ถามอะไรก็ได้
เชื่อม Python + python-telegram-bot
Requirements:
pip install python-telegram-bot anthropic python-dotenv
โครงสร้างโปรเจกต์:
my-ai-assistant/
├── .env
├── main.py
├── handlers/
│   ├── __init__.py
│   ├── message_handler.py
│   └── command_handler.py
├── tools/
│   ├── notion_tool.py
│   ├── calendar_tool.py
│   └── search_tool.py
└── memory/
    └── store.py
.env:
TELEGRAM_TOKEN=your_bot_token_here
ANTHROPIC_API_KEY=your_anthropic_key
NOTION_TOKEN=your_notion_token
YOUR_CHAT_ID=your_telegram_chat_id
หา YOUR_CHAT_ID ของตัวเอง:
ส่ง message ไปหา @userinfobot ใน Telegram จะได้ตัวเลข chat_id ของคุณ
main.py พื้นฐาน:
import os
import logging
from dotenv import load_dotenv
from telegram import Update
from telegram.ext import (
    Application,
    CommandHandler,
    MessageHandler,
    filters,
    ContextTypes,
)

load_dotenv()

logging.basicConfig(
    format="%(asctime)s - %(name)s - %(levelname)s - %(message)s",
    level=logging.INFO,
)

ALLOWED_CHAT_ID = int(os.getenv("YOUR_CHAT_ID"))


async def start(update: Update, context: ContextTypes.DEFAULT_TYPE):
    if update.effective_chat.id != ALLOWED_CHAT_ID:
        return  # ปฏิเสธคนอื่น
    await update.message.reply_text("สวัสดี! AI Assistant พร้อมแล้ว 🤖")


async def handle_message(update: Update, context: ContextTypes.DEFAULT_TYPE):
    if update.effective_chat.id != ALLOWED_CHAT_ID:
        return

    user_text = update.message.text
    # ส่งต่อไปหา LLM (ดูส่วนถัดไป)
    response = await process_with_llm(user_text)
    await update.message.reply_text(response)


def main():
    app = Application.builder().token(os.getenv("TELEGRAM_TOKEN")).build()
    app.add_handler(CommandHandler("start", start))
    app.add_handler(MessageHandler(filters.TEXT & ~filters.COMMAND, handle_message))
    app.run_polling()


if __name__ == "__main__":
    main()
ระบบ security ง่ายๆ คือ check chat_id ทุก request ถ้าไม่ใช่คุณก็ return เลย ไม่ต้อง password หรือ token แยก
ใส่ LLM เป็นสมอง (Claude / GPT)
ส่วนนี้คือหัวใจของ Personal Assistant — แทนที่จะ hardcode คำตอบ เราให้ LLM คิดแทน
ใช้ Claude (Anthropic):
import anthropic

client = anthropic.Anthropic(api_key=os.getenv("ANTHROPIC_API_KEY"))

SYSTEM_PROMPT = """คุณคือ Personal AI Assistant ของผม ชื่อ "Kai"
ตอบเป็นภาษาไทย กระชับ ตรงประเด็น
วันนี้คือ {date}
ถ้าต้องการ tool ให้บอกว่าต้องการอะไร"""


async def process_with_llm(user_text: str, chat_history: list = None) -> str:
    messages = []
    if chat_history:
        messages.extend(chat_history)
    messages.append({"role": "user", "content": user_text})

    response = client.messages.create(
        model="claude-opus-4-5",
        max_tokens=1024,
        system=SYSTEM_PROMPT.format(date=datetime.now().strftime("%Y-%m-%d")),
        messages=messages,
    )
    return response.content[0].text
หรือถ้าใช้ OpenAI GPT:
from openai import AsyncOpenAI

openai_client = AsyncOpenAI(api_key=os.getenv("OPENAI_API_KEY"))

async def process_with_gpt(user_text: str) -> str:
    response = await openai_client.chat.completions.create(
        model="gpt-4o",
        messages=[
            {"role": "system", "content": SYSTEM_PROMPT},
            {"role": "user", "content": user_text},
        ],
    )
    return response.choices[0].message.content
ผมแนะนำ Claude สำหรับ Personal Assistant เพราะ context window ใหญ่กว่า จำบทสนทนายาวๆ ได้ดีกว่า อ่านรายละเอียดเพิ่มได้ที่ Claude Agent SDK สำหรับคนไทย
เพิ่ม Tool: Notion, Calendar, Web Search
ความต่างระหว่าง Chatbot ธรรมดากับ AI Agent คือ Tool Use — ความสามารถในการ "ทำอะไรบางอย่าง" ในโลกจริง
Tool 1: Notion API
pip install notion-client
from notion_client import Client

notion = Client(auth=os.getenv("NOTION_TOKEN"))

def add_to_notion(title: str, content: str, database_id: str) -> dict:
    """เพิ่ม page ใหม่ใน Notion database"""
    new_page = notion.pages.create(
        parent={"database_id": database_id},
        properties={
            "Name": {
                "title": [{"text": {"content": title}}]
            },
            "Status": {
                "select": {"name": "Todo"}
            },
        },
        children=[
            {
                "object": "block",
                "type": "paragraph",
                "paragraph": {
                    "rich_text": [{"text": {"content": content}}]
                },
            }
        ],
    )
    return {"success": True, "page_id": new_page["id"]}


def search_notion(query: str) -> list:
    """ค้นหาใน Notion workspace"""
    results = notion.search(query=query, filter={"value": "page", "property": "object"})
    pages = []
    for page in results["results"][:5]:
        title = page["properties"].get("Name", {}).get("title", [])
        if title:
            pages.append({
                "title": title[0]["text"]["content"],
                "url": page["url"],
            })
    return pages
Tool 2: Google Calendar
pip install google-api-python-client google-auth-oauthlib
from googleapiclient.discovery import build
from google.oauth2.credentials import Credentials

def get_today_events(credentials: Credentials) -> list:
    """ดู event วันนี้"""
    service = build("calendar", "v3", credentials=credentials)
    now = datetime.utcnow().isoformat() + "Z"
    end_of_day = (datetime.utcnow().replace(hour=23, minute=59)).isoformat() + "Z"

    events_result = service.events().list(
        calendarId="primary",
        timeMin=now,
        timeMax=end_of_day,
        singleEvents=True,
        orderBy="startTime",
    ).execute()

    return [
        {
            "summary": e.get("summary", "ไม่มีชื่อ"),
            "start": e["start"].get("dateTime", e["start"].get("date")),
        }
        for e in events_result.get("items", [])
    ]
Tool 3: Web Search (DuckDuckGo)
pip install duckduckgo-search
from duckduckgo_search import DDGS

def web_search(query: str, max_results: int = 5) -> list:
    """ค้นหาข้อมูลจากเว็บ"""
    with DDGS() as ddgs:
        results = list(ddgs.text(query, max_results=max_results))
    return [
        {"title": r["title"], "snippet": r["body"], "url": r["href"]}
        for r in results
    ]
เชื่อม Tool กับ LLM (Tool Use / Function Calling)
Claude และ GPT รองรับ Function Calling ซึ่งทำให้ LLM ตัดสินใจเองว่าจะเรียก tool ไหน:
tools = [
    {
        "name": "add_to_notion",
        "description": "เพิ่ม task หรือ note ลงใน Notion",
        "input_schema": {
            "type": "object",
            "properties": {
                "title": {"type": "string", "description": "ชื่อ task"},
                "content": {"type": "string", "description": "รายละเอียด"},
            },
            "required": ["title"],
        },
    },
    {
        "name": "web_search",
        "description": "ค้นหาข้อมูลจากอินเทอร์เน็ต",
        "input_schema": {
            "type": "object",
            "properties": {
                "query": {"type": "string", "description": "คำค้นหา"},
            },
            "required": ["query"],
        },
    },
]


async def process_with_tools(user_text: str) -> str:
    response = client.messages.create(
        model="claude-opus-4-5",
        max_tokens=2048,
        system=SYSTEM_PROMPT,
        tools=tools,
        messages=[{"role": "user", "content": user_text}],
    )

    # ถ้า LLM ต้องการใช้ tool
    if response.stop_reason == "tool_use":
        tool_results = []
        for block in response.content:
            if block.type == "tool_use":
                if block.name == "add_to_notion":
                    result = add_to_notion(**block.input)
                elif block.name == "web_search":
                    result = web_search(**block.input)
                tool_results.append({
                    "type": "tool_result",
                    "tool_use_id": block.id,
                    "content": str(result),
                })

        # ส่งผลลัพธ์กลับไปให้ LLM สรุป
        final_response = client.messages.create(
            model="claude-opus-4-5",
            max_tokens=1024,
            system=SYSTEM_PROMPT,
            tools=tools,
            messages=[
                {"role": "user", "content": user_text},
                {"role": "assistant", "content": response.content},
                {"role": "user", "content": tool_results},
            ],
        )
        return final_response.content[0].text

    return response.content[0].text
แนวคิดนี้คือสิ่งที่เรียกว่า Agentic Loop — อ่านเพิ่มได้ที่ คู่มือ AI Agent ฉบับสมบูรณ์สำหรับคนไทย
Memory ระยะยาว
Chatbot ธรรมดาจำแค่ใน session เดียว แต่ Personal Assistant ที่ดีต้องจำได้ข้ามวัน เช่น "เมื่อวานสั่งให้หาข้อมูลอะไรไว้แล้ว" หรือ "ชอบสไตล์การตอบแบบไหน"
Option 1: Notion DB เป็น Memory Store
วิธีง่ายที่สุดและไม่ต้องติดตั้งอะไรเพิ่ม คือเก็บ conversation history ใน Notion database:
MEMORY_DB_ID = "your_notion_database_id"

def save_memory(user_msg: str, ai_response: str):
    notion.pages.create(
        parent={"database_id": MEMORY_DB_ID},
        properties={
            "User": {"title": [{"text": {"content": user_msg[:100]}}]},
            "Date": {"date": {"start": datetime.now().isoformat()}},
        },
        children=[
            {
                "type": "paragraph",
                "paragraph": {
                    "rich_text": [
                        {"text": {"content": f"User: {user_msg}\n\nAI: {ai_response}"}}
                    ]
                },
            }
        ],
    )


def get_recent_memory(limit: int = 10) -> str:
    results = notion.databases.query(
        database_id=MEMORY_DB_ID,
        sorts=[{"property": "Date", "direction": "descending"}],
        page_size=limit,
    )
    memories = []
    for page in results["results"]:
        title = page["properties"]["User"]["title"]
        if title:
            memories.append(title[0]["text"]["content"])
    return "\n".join(memories)
Option 2: Vector DB (ChromaDB) สำหรับ Semantic Search
ถ้าต้องการค้นหา memory แบบ semantic (ไม่ใช่แค่ล่าสุด แต่ค้นตาม context) ใช้ ChromaDB:
pip install chromadb sentence-transformers
import chromadb
from chromadb.utils import embedding_functions

chroma_client = chromadb.PersistentClient(path="./memory_db")
ef = embedding_functions.DefaultEmbeddingFunction()
collection = chroma_client.get_or_create_collection(
    name="personal_memory", embedding_function=ef
)


def save_to_vector_memory(text: str, metadata: dict):
    collection.add(
        documents=[text],
        metadatas=[metadata],
        ids=[f"mem_{datetime.now().timestamp()}"],
    )


def search_memory(query: str, n_results: int = 3) -> list:
    results = collection.query(query_texts=[query], n_results=n_results)
    return results["documents"][0] if results["documents"] else []
แล้วเพิ่ม relevant memory เข้าไปใน system prompt:
async def process_with_memory(user_text: str) -> str:
    relevant_memories = search_memory(user_text)
    memory_context = "\n".join(relevant_memories) if relevant_memories else ""

    system_with_memory = SYSTEM_PROMPT + f"\n\nMemory ที่เกี่ยวข้อง:\n{memory_context}"

    # ... call LLM ปกติ
ดูแนวคิด RAG และ Knowledge Base เพิ่มเติมได้ที่ AI Agent + RAG: สร้าง Knowledge Base อัจฉริยะ
Deploy บน Cloud
Bot ที่รันบน laptop ดับทันทีที่ปิดเครื่อง ต้องย้ายขึ้น Cloud ให้รันตลอด 24/7
Option 1: Railway (แนะนำสำหรับ Beginner)
Railway ง่ายที่สุด deploy ด้วย requirements.txt + Procfile:
Procfile:
worker: python main.py
requirements.txt:
python-telegram-bot==21.0
anthropic==0.30.0
python-dotenv==1.0.0
notion-client==2.2.1
duckduckgo-search==6.1.0
chromadb==0.5.0
ขั้นตอน deploy Railway:
- Push code ขึ้น GitHub
- ไป railway.app → New Project → Deploy from GitHub
- ตั้ง Environment Variables (TELEGRAM_TOKEN, ANTHROPIC_API_KEY ฯลฯ)
- Deploy — Bot รันทันที
ค่าใช้จ่าย: $5/เดือน สำหรับ Personal Bot เพียงพอมาก
Option 2: Fly.io (ยืดหยุ่นกว่า)
# ติดตั้ง flyctl
brew install flyctl

# Login และ init
fly auth login
fly launch  # จะสร้าง fly.toml ให้อัตโนมัติ
fly.toml:
app = "my-ai-assistant"
primary_region = "sin"  # Singapore ใกล้ไทย

[build]
  dockerfile = "Dockerfile"

[processes]
  worker = "python main.py"
Dockerfile:
FROM python:3.12-slim
WORKDIR /app
COPY requirements.txt .
RUN pip install -r requirements.txt
COPY . .
CMD ["python", "main.py"]
# ตั้ง secrets
fly secrets set TELEGRAM_TOKEN=xxx ANTHROPIC_API_KEY=yyy

# Deploy
fly deploy
Fly.io มี free tier ให้ 3 shared VMs ต่อเดือน เพียงพอสำหรับ Personal Bot
Option 3: Webhook แทน Polling
สำหรับ production ที่ต้องการ latency ต่ำ เปลี่ยนจาก polling เป็น webhook:
# แทน app.run_polling() ใช้:
app.run_webhook(
    listen="0.0.0.0",
    port=int(os.getenv("PORT", 8443)),
    webhook_url=f"https://your-app.fly.dev/webhook",
)
สำหรับ Fly.io ให้เปิด port ใน fly.toml ด้วย:
[[services]]
  internal_port = 8443
  protocol = "tcp"
หากสนใจ no-code alternative สำหรับ Telegram automation ดูได้ที่ n8n + Telegram Bot: ระบบ Automation ไม่ต้องเขียนโค้ด
Use Case ส่วนตัว
ตัวอย่างคำสั่งจริงที่ผมใช้ทุกวัน:
To-do & Task Management
"เพิ่ม task: เขียน report ก่อนวันศุกร์ priority สูง"
→ Bot เพิ่มใน Notion พร้อม due date

"งานค้างอยู่มีอะไรบ้าง?"
→ Bot query Notion database แล้วสรุปให้

"mark task เขียน report ว่าเสร็จแล้ว"
→ Bot update status ใน Notion
Quick Notes & Research
"note: ไอเดีย — สร้าง app สำหรับ track daily mood"
→ Bot บันทึกใน Notion Ideas database

"research: ความแตกต่างระหว่าง RAG กับ Fine-tuning"
→ Bot ค้นเว็บแล้วสรุปให้ภายใน 30 วินาที

"สรุป note ที่เก็บไว้เกี่ยวกับ AI เมื่อสัปดาห์ที่แล้ว"
→ Bot ค้นหา memory แล้วสรุปให้
Reminders & Calendar
"remind ตอน 9 โมงพรุ่งนี้: โทรหาคุณนก"
→ Bot เพิ่ม event ใน Google Calendar

"วันนี้มีนัดอะไรบ้าง?"
→ Bot ดึง calendar แล้วตอบ

"ว่างไหม 3 โมงบ่ายวันพุธ?"
→ Bot check calendar แล้วบอก
Daily Briefing (ตั้ง Cron)
เพิ่ม scheduled message ทุกเช้า 8 โมง:
from telegram.ext import JobQueue
from datetime import time as dt_time

async def morning_briefing(context: ContextTypes.DEFAULT_TYPE):
    events = get_today_events(credentials)
    tasks = get_pending_tasks_from_notion()

    message = f"🌅 Good morning! สรุปวันนี้:\n\n"
    message += f"📅 นัดหมาย: {len(events)} รายการ\n"
    for e in events:
        message += f"  • {e['summary']} ({e['start']})\n"
    message += f"\n✅ Task ค้าง: {len(tasks)} รายการ"

    await context.bot.send_message(chat_id=ALLOWED_CHAT_ID, text=message)


# ใน main() เพิ่ม:
job_queue = app.job_queue
job_queue.run_daily(
    morning_briefing,
    time=dt_time(hour=8, minute=0, tzinfo=pytz.timezone("Asia/Bangkok")),
)
ต่อยอดจากที่นี่
Bot ที่สร้างได้ตามบทความนี้คือ foundation ที่ดี แต่ความสามารถของ AI Agent ยังไปได้ไกลกว่านี้มาก:
- Multi-agent: ให้ Bot เป็น orchestrator ที่จัดการ sub-agent หลายตัว เช่น Research Agent, Writing Agent, Calendar Agent
- Voice input: รับ voice message จาก Telegram แล้วแปลงเป็น text ด้วย Whisper ก่อนส่งให้ LLM
- Image analysis: รับรูปภาพแล้วให้ Claude วิเคราะห์ เช่น อ่าน receipt แล้วบันทึกค่าใช้จ่ายอัตโนมัติ
- Proactive alerts: Monitor RSS feed หรือ email แล้ว push notification ใน Telegram เมื่อมีสิ่งที่สำคัญ
ดูภาพรวมว่า AI Agent ทำอะไรได้บ้างในปี 2026 ที่ agentic AI 2026 คืออะไร และเปลี่ยนอะไรในโลก
CTA: เรียน AI Agent แบบลึก
บทความนี้ครอบคลุม code พื้นฐาน แต่การสร้าง AI Agent ที่ robust และ production-ready ต้องการความเข้าใจลึกกว่านี้ ทั้งเรื่อง prompt engineering, error handling, cost optimization และ architecture
AI Unlocked มีหลักสูตรที่สอน AI Agent แบบ hands-on สำหรับคนไทย ตั้งแต่ concept จนถึง Deploy จริง รวมถึง workshop สร้าง Personal AI Assistant แบบนี้ทีละ step
อยากเรียนรู้เพิ่มเติมพร้อม community คนไทยที่สนใจ AI เหมือนกัน? ดูรายละเอียดได้ที่ แผนการเรียน AI ในเชียงใหม่ 2026 หรือดูแพ็คเกจทั้งหมดได้เลยที่ ราคาและแพ็คเกจ AI Unlocked
บทความนี้เป็นส่วนหนึ่งของ Cluster "Build AI Agents" — อ่าน pillar article ได้ที่ คู่มือ AI Agent ฉบับสมบูรณ์สำหรับคนไทย 2026
คำถามที่พบบ่อย (FAQ)
Q: ทำไมสร้าง Personal AI Assistant บน Telegram ไม่ใช้ LINE?
Telegram Bot API ใช้ได้ฟรีไม่จำกัดจำนวนข้อความต่อเดือน ต่างจาก LINE Messaging API ที่แพลนเริ่มต้นฟรีได้แค่ 500 messages/เดือน Telegram ยังรองรับ /command แบบ native มี Markdown และ inline buttons และเปิดใช้ได้ทั้ง iOS Android Desktop และ Web สำหรับ bot ส่วนตัวที่ใช้คนเดียว ค่าใช้จ่ายด้านแพลตฟอร์มจึงแทบเป็นศูนย์
Q: ต้องเขียนโค้ดเป็นไหม ถึงจะทำตามบทความนี้ได้?
บทความนี้เป็น tutorial แบบเขียนโค้ด ใช้ Python กับไลบรารี python-telegram-bot และเชื่อมสมองด้วย Claude หรือ GPT ต้องติดตั้งแพ็กเกจ ตั้งค่า .env และกรอง chat_id เพื่อให้มีแค่เจ้าของที่ใช้ bot ได้ ไม่ใช่แบบลากวางแบบ no-code
Q: ใช้ Claude หรือ GPT ตัวไหนดีสำหรับ Personal Bot?
ใช้ได้ทั้ง Anthropic Claude และ OpenAI GPT บทความแนะนำ Claude สำหรับ Personal Assistant เพราะ context window ใหญ่กว่า จำบทสนทนายาวๆ ได้ดีกว่า ตัวอย่างโค้ดใช้โมเดล claude-opus-4-5 และทาง GPT ใช้ gpt-4o
Q: Deploy บน Cloud ราคาเท่าไหร่ ใช้ฟรีได้ไหม? Bot ที่รันบนแล็ปท็อปจะดับเมื่อปิดเครื่อง จึงต้องย้ายขึ้นคลาวด์ให้ทำงาน 24/7 Railway แนะนำสำหรับมือใหม่ ค่าใช้จ่ายประมาณ $5/เดือน สำหรับ Personal Bot ส่วน Fly.io มี free tier ให้ 3 shared VMs ต่อเดือน ซึ่งบทความระบุว่าเพียงพอสำหรับ Personal Bot
Q: จะให้ Bot จำข้ามวันได้อย่างไร? Chatbot ธรรมดาจำได้แค่ใน session เดียว Personal Assistant ที่ดีต้องจำข้ามวัน วิธีง่ายสุดคือเก็บประวัติใน Notion database โดยไม่ต้องติดตั้งอะไรเพิ่ม ถ้าต้องการค้นแบบ semantic ตามบริบท ใช้ ChromaDB แล้วฉีด memory ที่เกี่ยวข้องเข้า system prompt
Q: เริ่มสร้าง Bot ยังไงใน 5 นาทีแรก?
ค้นหา @BotFather ใน Telegram พิมพ์ /newbot ตั้งชื่อและ username ที่ลงท้ายด้วย bot แล้วเก็บ Bot Token ไว้ หา chat_id ของตัวเองจาก @userinfobot ใส่ใน .env พร้อม API key ของ LLM จากนั้นรัน main.py แบบ polling ได้เลย
Q: Bot ทำอะไรได้บ้างนอกจากคุย? ความต่างจากแชทบอทธรรมดาคือ Tool Use บทความเชื่อม Notion สำหรับ to-do และโน้ต, Google Calendar สำหรับนัดและ reminder และ DuckDuckGo สำหรับค้นเว็บ นอกจากนี้ยังตั้ง Daily Briefing ส่งสรุปนัดและงานค้างทุกเช้า 8 โมงตามเวลา Asia/Bangkok ได้
เขียนโดย
AI Unlocked Team
สถาบันสอน AI และ Vibe Coding — เชียงใหม่และออนไลน์
AI Unlocked สอน AI และ Vibe Coding มากว่า 15 ปี ผู้เรียนกว่า 1,500 คน โฟกัสลงมือทำจริงด้วย Claude Code, n8n และ AI Agent
บทความในหัวข้อเดียวกัน
สร้าง AI Agent — Complete Guide ภาษาไทย 2026
เรียนรู้สร้าง AI Agent ตั้งแต่ศูนย์ ครอบคลุม Claude Agent SDK, OpenAI Agents, LangGraph, n8n พร้อม Use Case ธุรกิจไทย — เริ่มต้นได้วันนี้
AI Agent + Voice — สอนสร้าง Voice Assistant ภาษาไทย
สอนสร้าง AI Voice Agent ภาษาไทยตั้งแต่ STT → LLM → TTS พร้อม tutorial Python และ use case จริง — เริ่มต้นได้วันนี้ที่ aiunlock.co
AI Agent สำหรับ E-commerce — Auto Reply + Order Tracking
AI Agent ecommerce ตอบลูกค้า 24/7 บน Shopee, Lazada, Line, FB — ครอบคลุม order tracking, stock check, escalation พร้อม workflow จริง เริ่มต้นได้เลย